|
|||
|---|---|---|---|
| # of Zones | 2 | ||
| # of Welkynd Stones | 21 | ||
| # of Varla Stones | 1 | ||
| Occupants | |||
| Zombie Undead, Monsters (1 boss-level Monster) |
|||
| Important Treasure | |||
| 1 boss-level Ayleid Reliquary | |||
| Console Location Code(s) | |||
| NagastaniExterior, Nagastani, Nagastani02 | |||
| Region | |||
| Heartlands | |||
| Location | |||
| East of the Imperial City, southeast of the junction of the Red Ring Road and the Blue Road | |||
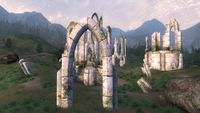
Nagastani is a medium-sized Ayleid ruin between the Imperial City and Cheydinhal containing monsters and undead. It contains two zones: Nagastani and Nagastani Sedorsel.
NotesEdit
ExteriorEdit
- The exterior is located at coordinates: Tamriel 20, 16
- This location's map marker (M on map) is named Nagastani (editor name NagastaniMapMaker). The entrance door is NE of the marker, 120 feet away.
- 2-3 Mud Crabs are near the entrance
- The following plants can be found near the entrance: 10 Water Hyacinth plants
Zone 1: NagastaniEdit
This zone contains more traps than enemies; your first taste is the three Swinging Blade traps (D) found in the corridor connecting the two main rooms. These are actually quite easy to pass through since only one blade per trap will be swinging. In the first chamber are two Hidden Doors at F and G which will open once you are close enough. Behind them are two enemies and a minor loot chest. The last two rooms contain four Gas Traps (E) each; these can be easily bypassed by sticking to the walls of the rooms.
Occupants:
Treasure:
- 1 Ayleid Cask 01 (locked)
- 1 Ayleid Cask 02
- 14 Welkynd Stones. 6 are in the first large room; 5 on easily reachable pedestals and 1 on the floor next to the base of the pedestal. The other 8 are in the second, rectangular shaped room; all on easily reachable pedestals.
Traps:
- 8 Gas traps at locations E on map
- 3 Swinging Blade traps at D
Doors and Gates:
- There are two doors in/out of this zone
- 1 door (at Out) leads outside
- 1 door (at C) leads to the zone Nagastani Sedorsel
- 2 Hidden Doors at F and G
Zone 2: Nagastani SedorselEdit
The first large room is quite tricky: a large Gas Room trap (D) is in the middle of the room and fighting the two enemies without getting trapped inside can be challenging. A Varla Stone (V) can be found in an alcove in north side of the room. From this chamber, two paths depart: up the stairs to the right leads to gate F, which unfortunately only opens from the other side (cyan dot on map). Heading left is therefore the only viable option. You will eventually end up in a large chamber containing the Boss chest (B); which is guarded by the boss-level Monster (A) and up to three other enemies.
Occupants:
- 1 boss-level Monster at location A on map
- 7 Monsters
Treasure:
- 1 boss-level Ayleid Reliquary (Monster variety; locked) at location B on map
- 1 Varla Stone at V
- 1 Ayleid Cask 01 (locked)
- 1 Ayleid Cask 02 (locked)
- 1 Restoration Ayleid Chest
- 7 Welkynd Stones. 4 are in the first chamber, high up on their pedestals and the remaining three are found in the final room also high up on their pedestals (see the stones' page for tips on how to reach them). The Welkynd Stone in the southern part of the final chamber is stuck inside its pedestal and can be removed by skillfully using Area-effect spells, or if you have high speed and acrobatics, you can reach it by jumping along the ledges on the wall starting from the pedestal with rubble beside it.
Traps:
Doors and Gates:
- There is one door (at C) in/out of this zone, leading to the zone Nagastani
- 1 Iron Gate (opened remotely) at F
