Online:The Great Shackle
< Elder Scrolls Online: Places: Coldharbour / Daedric Ruins / Quest Hubs(Redirected from Online:The Mooring)
|
||||
|---|---|---|---|---|
| Quest Hub | ||||
| Discoverable | Yes | |||
| Completion | Objective | |||
| Occupants | ||||
| Bull Netch, Daedroth, Dremora Caitiff, Dremora Hauzkyn, Dremora Kynlurker, Watcher (Quest-related): Dremora Baunekyn, Dremora Beldakyn, Dremora Ferylkyn, Dremora Gandrakyn, Dremora Morikyn, Frost Atronach, Storm Atronach |
||||
| Zone | ||||
| Black Garrison, Coldharbour | ||||
| Location | ||||
| Eastern Coldharbour, linked with The Black Forge | ||||
| Loading Screen | ||||
|
According to Camilonwe of Alinor, the Sapiarch of Transliminal Arts in the Crystal Tower, an artifact that could physically bind disparate planes together would have to be fabricated so as to exist simultaneously in multiple locations.
|
||||
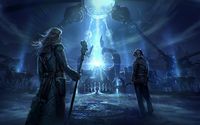
The Great Shackle is a Daedric ruin in eastern Coldharbour. It houses the largest and most potent Dark Anchor built yet, which is hooked up to a large amount of machinery and powered by storm atronachs.
After capturing Vanus Galerion, the dremora occupying the installation intended on using him as their new, and exponentially better, power source until he divided into his essences and foiled their plans.
Related QuestsEdit
- The Great Shackle Objective: Destroy the Great Shackle and end the Planemeld. / You destroyed the Great Shackle.
- Breaking the Shackle: Destroy Molag Bal's Great Shackle.
PeopleEdit
|
 WayshrineEdit
The Great Shackle Wayshrine is located at the Black Forge end of the bridge outside the compound.
LocationsEdit
Shackle BridgeEdit
A long bridge that crosses over a large pool of Azure Plasm. A magic barrier blocks entry into the shackle to those who are not on the first half of the related quest.
The Great ShackleEdit
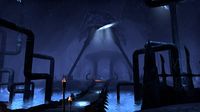
You need to descend a staircase in order to progress. If you go beneath the staircase, you may find a heavy sack beside the larger of the two bookshelves. Two Kynlurkers and a Caitiff block the way to the next room. Shriven Workers move barrels in the next room as their Dremora guards watch. Kynlurkers, Hauzkyn and Caitiffs stand watch. The Hauzkyn here are bonelords rather than pet rangers. Machines pound chains into shape. Conveyors high up in the walls feed freshly fabricated chains to some other location to be used in Molag Bal's conquest of Mundus. The Power Chamber lies through a door to the north. Steam Vents are found throughout the zone.
Power ChamberEdit
A machine central to the room powers the Great Shackle. During the quest, a Storm Atronach is being held within the chamber as a power source. A parchment titled The Great Mooring is located on a table to the right as you enter. The closed gate on the east side of the room is guarded by a Daedroth. The hall to the north leads you to a set of stairs that brings you to the catwalk. Steam traps litter the floor, and two Daedroths patrols the hallway. Sage Tirora is trapped in a cage in the first room on the left within this hall. Treva is trapped in a cage in a room further down the hall, to your right. Watchers guard both of their rooms. A blacksmithing ore node can be found a little ways further down, near a Caitiff's patrol route. Steam Vents are found throughout the zone.
The hallway to the west leads towards the mooring. A Daedroth stands in the middle of the hall, and Cadwell is leaning against the wall by the door.
Power Chamber CatwalkEdit
The catwalk above the power chamber. A Watcher guards the staircase leading up to it, and two Daedroth flank the staircase. A large hammer sits next to a pedestal with an Anchor chain upon it lies beneath the stairs. A note titled The Source of Power is sitting atop the chain. You need to reverse the flow of energy through three Magicka conduits up here: one it at the top of the stairs, one lies to the north, and the other to the south. Two Caitiffs guard the northern conduit.
The MooringEdit
This is where the Great Shackle is moored. You will fight many Daedra as Vanus Galerion destroys it.
Two Dremora Gandrakyn and two Beldakyn emerge from the portal on the left afterwards. The next wave comes from the portal on the right, and contains two Gandrakyn and two Baunekyn. The next comes from the left, consisting of two Ferylkyn and two Frost Atronachs. The final wave emerges from the portal on the right. It contains two Storm Atronachs and two Dremora Morikyn.

